Task: Pixel Art: Pirates
06.15.2011Softwares:
Summary
We worked together on a project wih a friend. I was in charge of Graphic design on that game.
Work: Designing the game together. Creating landscapes, characters with animations, and stuff in pixel art.
The game hero
The main character needed a lot of animations: something about 25 (either 150 frames).He is able to do acrobatics. A few examples in this video:
Landscapes
Of course, I can't show many things but this example of ambience. Then, the landscape is made to allow the parallax scrolling. Like many 16-bytes games, the elements move together with coherence in order to give an effect of depth: close elements move faster than far ones.
Goblins
A few animations as a bonus. Rude Goblins appear sometimes in the game.
Task: Synchronization: Frame/Music
08.12.2010Softwares:
Summary
The main feature of the game is the synchro between music and display.
Responsability: Coding the feature.
On Pump it! I had to code the synchronization managment between the game and the music.
The deltaTime
Usually, real-time videogames work on the deltaTime purpose: it's the time difference between two successive frames. Normally, this time should be steady:
For an application in 30 frames per second, the time between two frames is 1/30 a second: 0.03333.. s.

Nevertheless, according to the hardware, to the processor activity, this time fluctuates during the execution. Know it is useful to move the screen elements in order to fill the framerate slowdowns or increases. The game is fluid then and even when the framerate is low, the time remains constant.
Synchronization with the music
To synchronize the game with the music, all we have to do is to calculate the deltaTime using the audio track. That means we calculate the difference between the readhead position in milliseconds between the current frame and the previous one. Then, if the audio track slows down or plays faster, the elements positions on the screen are adjusted and perfectly synchronized to the sound.

On the code side
We calculate the deltaTime corresponding to the sound track with a function called on each frame.
import flash.display.MovieClip;
import flash.events.Event;
import flash.media.SoundChannel;

public final class SoundTimer
{
	private var _channel:SoundChannel;//A reference to the music

	private var _lastTime:Number;//Keep the readhead position on the last frame
	private var _deltaTime:Number = 0;//Keep the deltaTime

	public static function get deltaTime() {//the deltaTime can be reach anywhere
		return _deltaTime;
	}

	public function SoundTimer(soundChannel:SoundChannel)
	{
		//We call updateDeltaTime on each OnEnterFrame
		//updateDeltaTime is called on each frame
		var mc:MovieClip = new MovieClip();
		mc.addEventListener(Event.ENTER_FRAME, updateDeltaTime);

		_lastTime = 0;//At start, the last time is 0
		assignSound(soundChannel);//assign the reference to the music
	}

	public function assignSound(soundChannel:SoundChannel) {
		channel = soundChannel;
	}

	private function updateDeltaTime(ev:Event) {
		var currentTime:Number = _channel.position;//We get the readhead position on the current frame
		_deltaTime = (currentTime-_lastTime) / 1000;//we get the difference between the current frame and the previous one
		//The position at the previous frame is changed by the current position
		//Then, when the function is called on the next frame, the previous position is the previous frame value.
		_lastTime = currentTime;
	}
}
Next, we use the deltaTime to calculate the notes movement, for example.
//! This code isn't optimized but it illustrate the example
//...
private var tones:Vector.<Sprite>//Keep the tones
private tempo:Number = 120;//The tempo in beats/minuts is regular here
private laneWidth:Number = 200;//The length in pixels travelled by a tone on each beat
//...
//Update is called on each frame
public function update() {
	for each(var tone:Sprite in tones) {
		//We translate the tempo in seconds
		//We multiply by the length it must travel in a beat
		//We multiply by the time elapsed between the current and the previous frame to get synchronize with the music
		tone.x  +=  tempo / 60 * laneWidth * SoundTimer.deltaTime;
	}
}
//...
Task: PUMP IT! Interface V1.0
07.15.2010Softwares:
Summary
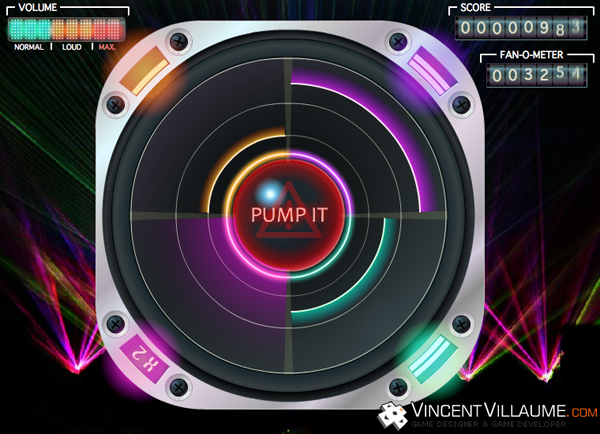
This is the first interface of the game. I drew it at the beginning of the project.
Responsability: I designed the game screen.
At the same time as the Game Design was progressing, I drew a first sketch of the Pump it! interface.
For this interface, I was inspired by the most played rhythm games on the moment: Guitar Hero, Rock Band.
The videogame we had to make was originally was meant for the David Guetta fanpage, so I dwelled on a design suiting with the musical style of the artist and his audience.
The data to display was:
- The game area with the four quadrants, the pump it button, the tones
- The X2 bonus multipliers on each quadrant
- The score, the fan number: Fans are added to the score at the end of a game
- The volume: the gauge depicting the collected tone number. At its limit, the player clicks on the pump it button at the center, when it's red.
Finally, the interface depicts a speaker with some tones sliding on it. The center is the tone collector point and corresponds to the button to click when the limit of the collector is reached. On each corner, bonus values are clearly identifiable thanks to their glowy design.
Concerning the tone sliding movement, we would think they should move from the center to the exterior because it corresponds to the sound propagation but, on the gameplay side, tones are harder to follow because the sight is on the four corners of the screen at the same time. It sounded better to keep a movement from corners to center.
A version 2
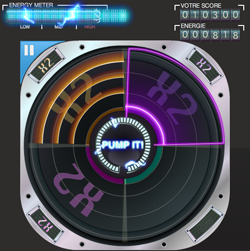
Between the first and the second version, we brought in question some gameplay features and readjusted the interface. I changed my job to coder at this time and the graphic designer in our team modified the design.
- The volume gauge was kept for the aesthetic but we had to add a sign to the center where the sight is focused. We put a gauge around the pump it button.
- The button red color was changed for a blue color.
- The multipliers are visible easier thanks to a X2 backgound that appears on each quadrant.
- The 4/3 aspect ratio became a square, we had to adapt.
- We added a pause feature we can trigger with the button on the top and left hand corner.
- Graphic design was refined.
Task: Game Design on Pump it!
07.02.2010Softwares:
Summary
In pre-production, we worked together on the Game Design document for the game Pump it!
Work: Writing the Game Design document to get user stories for the Scrum method.
The first task we had on Pump it was its game design. We started with a game concept with a little prototype and writed the game design document. All these documents are written by our team.
The game concept
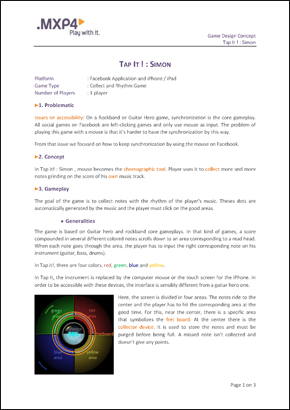
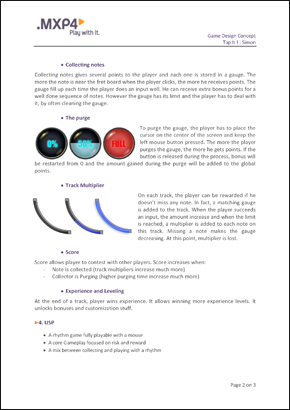
Originally called Simon, like the Ralph Baer's memory game, we changed to pump it during the game design document step.
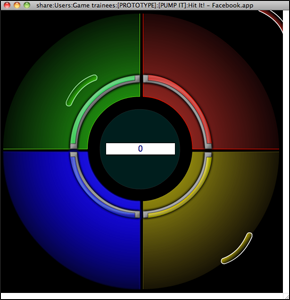
The prototype
For me, when ideas can be implemented easily, it is important to work on some prototypes. Very early, we decided to create a little one to show the game purpose to our direction. Made in ActionScript2 by one of our team members, it was very useful to communicate on the project.
The Game Design document (GDD)
The game design document was mainly used to feed the product backlog. We were in Scrum method so we decided to focus on a document oriented on the customer needs (the MXP4 direction). Unfortunatly, I can't show the GDD on this website.
Task: The savegame
04.22.2010Softwares:
Summary
Like all next-generation videogames, Contre-Jour saves automatically the player progress with checkpoints (Here,the level change). Then, the player can go back to the current level if he quits.
Work: I coded the save and load processes.
As an adventure game, Contre-Jour has a storyline. So, it was necessary to save the player progress in the game. As well, the game is organized in little levels linked together with some entrances/exits. When the hero moves to another level, the progress is saved in a binary file.
The save concerns different data:
- The player data: coins collected, current level, current entrance in the level...
- The data concerning all the levels: the position of the pushable objects, the coins and items taken, the doors opened, the switches positions,...
- The savable parameters concerning the GSE: To play events only once, ...
To do this, I used a binary file with a specific nomenclature. This kind of file is sequentially organized. A playhead reads or writes the data and moves forward.
The savegame nomenclature
In the main flow

- The player data at first
- The byte number of the whole flow concerning the levels
In the levels flow

The flow contains the total of levels and a list with each level data as items: the number of bytes and each level flow corresponding.
In each level flow

Each flow contains the number of the objects saved and the sequential list of the data for each one. An object data is made of an identifier and a specific flow. (For a pushable crate, we keep the position for example). GSE boxes are handled like other objects but we save the parameters instead.
On the code side
Originally, I used two kinds of basic C# functions.
//Create a file or open the existing one and delete the content
BinaryWriter binWriter = new BinaryWriter(File.Open("myfile.txt",FileMode.Create));
//Write data in the file
binWriter.Write("CJSaveGame");//a string
binWriter.Write(10);//an int
binWriter.Write(10.5f);//a float
binWriter.Write(true);//a bool
//etc.
binWriter.Close();//close the fileif(File.Exists("myfile.txt")){//Verify the file existence
//Open the file
BinaryReader binReader = new BinaryReader(File.Open("myfile.txt" , FileMode.Open));
try{
if(binReader.PeekChar() != -1)//If the file isn't empty
{
//ReadString: read bytes and move the readhead
string str = binReader.ReadString();//a string
int integer = binReader.ReadInt32();//an int
float number = binReader.ReadSingle();//a float
bool boolean = binReader.ReadBoolean();//a bool
}
}
finally{
binReader.Close();//close the file
}
}